How to Propagate Asparagus Ferns in 3 Easy Ways
Some links in this post may be affiliate links
Asparagus Fern is propagated by plant division or from seeds in spring to early summer. Seed germination is slow, taking upto three seasons for the plants to mature.
Propagating Asparagus Ferns in the beginning of the growing season (spring to early summer) ensures that new roots establish quickly, and the plant recovers from the stress of propagation. Avoid propagating in winter, as growth slows down, making it harder for the new plant to establish itself.
Whether you are a seasoned plant enthusiast or a beginner, propagating Asparagus Ferns is a rewarding way to expand your collection. We have herebelow outlined 3 methods by which you can successfully multiply these ferns.

(A) How to Propagate Asparagus Fern by Plant Division
Division is the easiest and most reliable way to propagate Asparagus Fern. Since the plant naturally forms clumps, separating these sections and replanting them allows you to create multiple plants.
1. Asparagus Fern propagation by plant division in water
Requirements
- Hand gloves to protect your hands
- Clean, sharp pair of scissors or knife
- Jar of plain water or a propagation station
- Well-drained, potting mix
- Watering can and clean water
- Small pots about 8-10 inches
Asparagus Fern propagation in water
- Water the fern thoroughly at least 1 day before to make it easier to divide and also hasten establishment as a well hydrated plant suffers less shock and takes a shorter time to take root.
- Slip the plant out of its pot, remove excess soil, thoroughly wash the roots with plenty of water, disentangle the roots and cut away any dead roots.
- With a clean, sharp pair of scissors or knife, carefully divide the plant into several sections. Ensure each section has adequate roots to encourage establishment.
- Place each division in a jar of plain water or in a propagation station while ensuring that the root base is well submerged but keep the foliage above the water surface.
- Place the set up in a warm, well-lit spot away from direct sunlight to avoid scorching. Change the water every 5-7 days to keep it fresh and prevent fungal growth.
- When a good amount of new roots have formed on the sections, transfer the sections in moist rooting soil into individual pots at least 1 inch wider than the base of the rooted sections.
- Position the set up in a warm, well-lit place away from direct sunlight to prevent scorching and death of the plant.
- Maintain the soil moist until the new plants are well established.
- Transfer the new fern into a pot 1 size larger than the current one while ensuring that the soil is well-drained after which you can begin routine care.
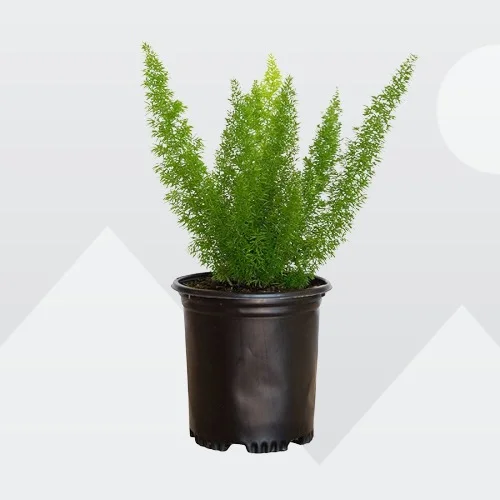
2. Asparagus Fern propagation by plant division in soil
Requirements
- Hand gloves to protect your hands
- Clean, sharp pair of scissors or knife
- 6-10 inches pots
- Well-drained, potting medium
- Watering can and clean water
Asparagus Fern propagation in soil
- Water the fern thoroughly one day before to make it easier to divide and also hasten establishment as a well hydrated plant suffers less shock and takes a shorter time to take root.
- Slip the plant out of its pot, remove excess soil, disentangle the roots and cut away any dead roots.
- With a clean, sharp pair of scissors or knife, carefully divide the plant into several sections. Ensure that each section has adequate roots to hasten rooting.
- Select a 6 or 8 inches pot and ensure that the pot has a drainage hole to prevent the soil from getting soggy to avoid rotting.
- Fill the pot with well-drained, potting medium and make a hole in the center of the pot. Ensure that the hole is slightly wider than the root base of the section.
- Place the section in the previously made hole and lightly firm the soil around the base while taking care not to bury it too deep; maintain the section at the same soil level it was in the previous pot.
- Liberally wet the soil until water comes out through the drainage holes. Place the pots in a warm, well-lit place away from direct sunlight until new growth emerges on the sections.
- Maintain the soil moist until the new ferns are well established.
- Repot the new fern into a pot 1 size larger than the current one in well-drained soil after which you can begin routine care.
(B) How to Grow Asparagus Fern from Seeds
Growing Asparagus Fern from seeds is a longer process but rewarding if you are patient. The plant produces small, green berries that turn red when ripe, containing viable seeds for propagation.
3. Asparagus Fern propagation from seeds
Requirements
- Hand gloves to protect your hands
- Jar of plain water or a glass
- Well-drained, potting mix
- Plastic wrap or clear polythene bag
- Misting bottle and clean water
- Small pots about 6-10 inches
Asparagus Fern propagation from seeds
- Soak the berries in a jar or glass of water for 24 hours and select those that fall to the bottom of the container as they have higher germination percentage. Peel the berries to extract the seeds.
- Fill 6 or 8 inches pots with a well-drained, potting medium, mist the soil and make 2 small holes in the soil.
- Place a seed in each hole, cover lightly with some soil and mist slightly.
- Cover each pot with plastic wrap or a clear polythene bag and position the set up in a warm, brightly-lit spot away from direct sunlight.
- Mist the soil regularly to keep it moist through out. Germination should occur in 4-6 weeks. Once germinated remove the plastic wrap or bag and maintain the soil moist.
- When the seedlings are about 4-6 cm tall, uproot the weaker seedling from each pot to allow adequate room for the growth of the stronger seedling.
- Keep the soil moist until the new ferns are well established.
- Transfer the new plants into a pot 1 size larger than the current one. Ensure that the soil is well-drained and you can now begin routine care.
Caring for newly propagated Asparagus Ferns
- Light: Place it in medium to bright indirect light away from direct sunshine.
- Humidity: Maintain a humidity of 50-55%; use a wet pebble tray or a humidifier to elevate humidity.
- Temperatures: Keep temperatures between 16-280C; avoid drafts from heat sources, windy doors, AC units, drafty windows among others.
- Watering: Keep the soil moderately moist but not soggy. Water when the top 2-3 inches of soil feel dry to the touch.
- Soil: Use a rich, well-draining potting mix made up of peat, perlite, and compost.
- Feeding: Start fertilizing after 4-6 weeks with a balanced, water-soluble fertilizer. Thereafter, fertilize every 2-3 weeks in spring and summer.
- Pruning & maintenance: Remove any yellowing or dead fronds to encourage new growth.
- Pests: Regularly check for pests like spider mites and aphids. Treat infestations with neem oil or insecticidal soap.
Conclusion
Propagating Asparagus Ferns is an exciting way to expand your indoor garden. Whether you choose division for quick results or seeds for a rewarding challenge, following proper care techniques ensures healthy, thriving plants. By providing the right balance of light, moisture, and warmth, your newly propagated Asparagus Ferns will flourish, adding lush greenery to your home.
Frequently Asked Questions
1. What is the easiest way to propagate Asparagus Fern?
Division is the easiest method of Asparagus Fern propagation since it produces immediate results and requires minimal effort.
2. Can you grow Asparagus Fern from a cutting?
No, Asparagus Fern does not root easily from stem cuttings. It is best propagated through division or seeds.
3. Can Asparagus Fern be propagated in water?
Yes. The Asparagus Fern plant sections can be rooted in water.
4. Why is my propagated Asparagus Fern not growing?
Your propagated Asparagus Fern may not be growing due to overwatering, underwatering, low humidity, insufficient warmth, too liitle light or soggy soil.
5. How long does it take to propagate Asparagus Fern?
Plant division: 2-3 weeks.
Seeds germination: 4-6 weeks.
You liked it? Share on social media.
Related Content
Amazon Associates Disclosure
Homeplantsguide.com is a participant in the Amazon Services LLC Associates Program, an affiliate advertising program designed to provide a means for sites to earn advertising fees by advertising and linking to amazon.com.
