Anthurium clarinervium (Velvet Cardboard Anthurium) Care Indoors, Propagation & Problems
Some links in this post may be affiliate links
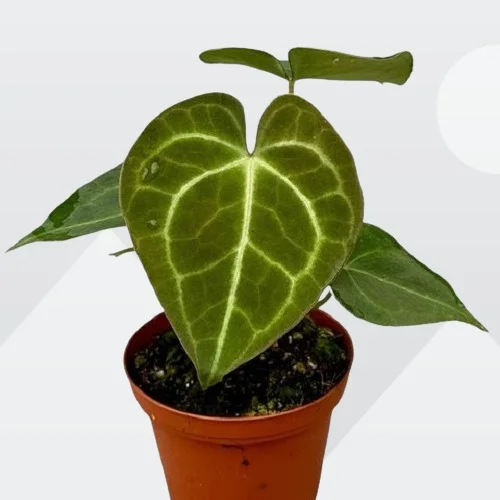
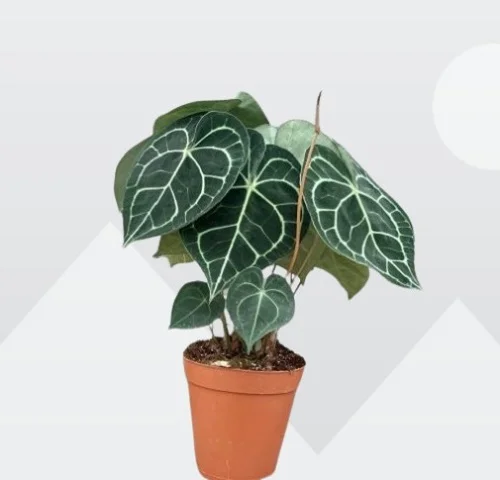
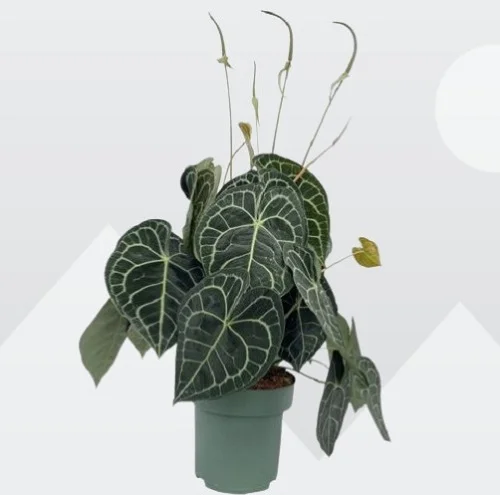
Anthurium clarinervium often called Velvet Cardboard Anthurium is one of the rare Anthurium varieties which is liked for its venation pattern whose 1 cm wide veins vary in color between ivory and light green.
The ovate, deeply-lobed, velvety leaves, resembling a love heart with whitish veins are a spectacular sight to behold which makes Velvet Cardboard Anthurium one of the most sought-after plants.
Anthurium clarinervium is often mistaken for Anthurium crystallinum and Anthurium magnificum due to the their similarity in appearance though they differ in size and leaf presentation.
Botanical name: Anthurium clarinervium
Family: Araceae
Common name: Velvet Cardboard Anthurium
Origin
Anthurium clarinervium is native to Mexico in South America where it is found growing as an epiphyte, climbing on tree-trunks to get to the canopy for sunlight.
How big do Anthurium clarinervium get?
Anthurium clarinervium can grow to a height of 2 feet and the leaves can be 1 foot wide when grown in the right growing conditions.
Is Anthurium clarinervium toxic?
Yes. Like other Anthuriums, Anthurium clarinervium is considered toxic to both humans and pets. Anthuriums contain oxalate crystals which can cause digestive distress, breathing problems and skin irritation. Keep the plants away from children and pets. Always wear gloves when handling this plant and wash your hands thereafter.
Where to Buy
If you are looking to add Anthurium clarinervium to your collection, you may obtain these plants from Etsy (Link to Etsy).
Anthurium clarinervium Care Indoors
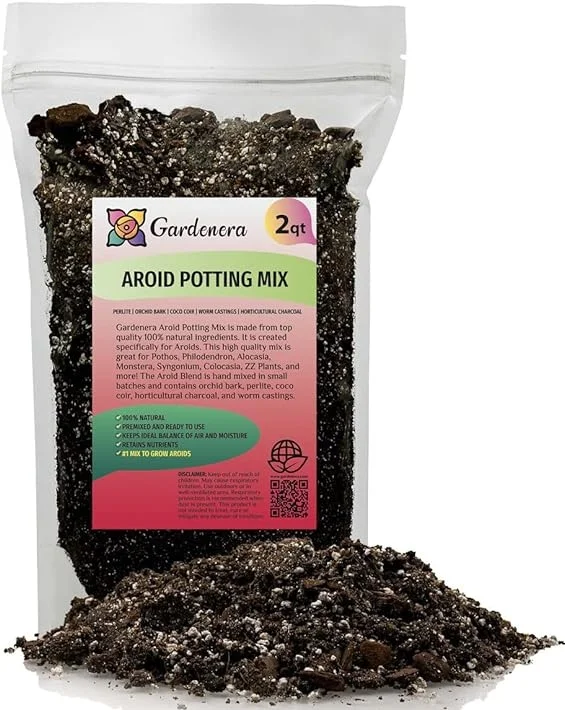
To care for Anthurium clarinervium indoors, give it bright indirect light, warmth of 18-270C, humidity of 50-60% and moist, fertile, aroids potting mix coupled with fortnightly feeding during the growing period.
Velvet Cardboard Anthurium requires removal of yellow and dead leaves to keep it neat as well as minimize pest and disease infestations. Repotting is only needed when pot-bound. Keep reading for more on the best growing conditions for this plant.
Watering
How often should I water Anthurium clarinervium?
Water Anthurium clarinervium liberally in spring and summer until water drains through the drainage hole. Allow the top 1-2 inches feel dry to the touch. Keep the soil consistently moist but not soggy to prevent rotting, yellowing and browning leaves.
Cut down on watering in fall and winter to maintain the soil slightly moist as growth is minimal at this time. Do not let the soil dry out completely for a prolonged period to prevent wilting, drooping and yellowing leaves.
Use room temperature water because consistently watering with cold water can cause cold shock which can result in reduced growth and plant death. Only use chlorine-free water like rainwater to prevent browning of leaf edges.
Confirm that the pot has a drainage hole and the soil is well-draining to prevent sogginess as it can result in root-rot. Always empty the saucer after watering to prevent waterlogging of the soil. Avoid wetting the foliage to minimize fungal diseases.
Light Requirements
Where is the best place to put Anthurium clarinervium?
Anthurium clarinervium grows best in bright indirect light (partial shade); a spot infront of a bright, sunless window is perfect for this plant. Keep it away from direct sunshine to prevent scorching of the leaves leaving it with ugly, brown marks.
If the natural lighting in your home is not sufficient, consider instaling full spectrum grow lights to increase it to prevent yellowing and leggy growth.
Rotate the pot regularly to ensure that the plant receives light on all sides for uniform growth and avoid lop-sided growth.
Temperature & Humidity
Anthurium clarinervium does well in a warmth of 18-270C. Keep it away from cold drafts to prevent sudden changes in temperature as they can cause reduced growth.
Velvet Cardboard Anthurium prefers a humidity of 50-60% . If the humidity is below 50%, group the plants together, set the pot on a wet pebble tray or use a humidifier to raise humidity. You can also grow the plant in a closed terrarium.
You may also grow the plant in a well-lit bathroom, kitchen, laundry area and other moist areas in the home. Maintain a good air flow to prevent fungal diseases.
Fertilizer
What is the best fertilizer for Anthurium clarinervium?
Feed Anthurium clarinervium with a balanced, water-soluble fertilizer every 4-6 weeks during the growing period. Withhold feeding in the cold season as growth is minimal at this time and feeding it at this time can result in fertilizer burn.
To get rid of excess salts, regularly run a stream of water through the soil until the water drips through the drainage hole. Allow it to run for a few minutes and repeat the process several times to clear most of the salts.
Potting Soil
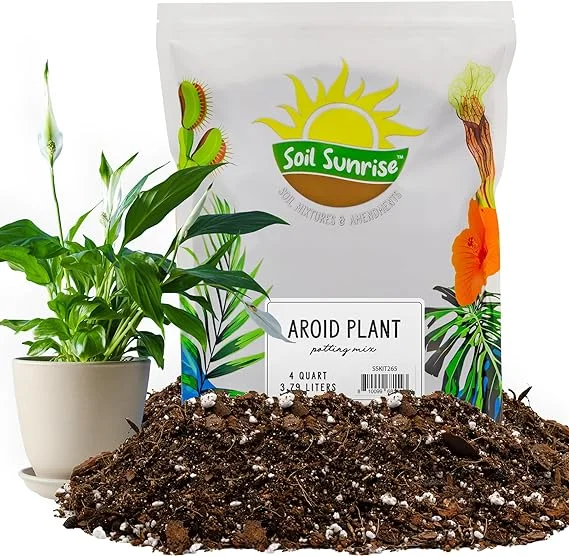
The best potting mix for Anthurium clarinervium should be rich in organic matter and well-drained to prevent it from getting soggy while providing the required nutrients. An Aroids potting mix is ideal for the plant.
Repotting
When to repot Anthurium clarinervium?
Repot Anthurium clarinervium every 1-2 years at the beginning of the growing season when pot-bound. Use a pot one size larger than the current one and chunky aroids soil that is rich in organic matter.
Ensure that the pot has a drainage hole to prevent the soil from getting soggy as it can lead to root-rot and eventual death of the plant. Check out these self watering pots on Amazon.
Pruning & Grooming
Pruning Anthurium clarinervium involves removal of yellow and dead leaves to maintain the plant tidy and to reduce pest and disease infestations.
Cut the leaves at the base of the stem with a sharp sterlized knife or a clean pair of scissors to avoid unnecessary injuries which can result in disease infestations. Cut away any wayward leaves to maintain the shape of the plant.
Gently damp wipe the leaves with a soft cloth to get rid of dust. Dry any water droplets on the leaves and ensure that there is good air circulation to prevent fungal infestations.
Anthurium clarinervium Propagation
Anthurium clarinervium is best propagated at the beginning of the growing season from offshoots . Below is an outline on propagation from offshoots.
Propagation Anthurium clarinervium from offshoots
- Water the plant thoroughly at least 1 day before to make it easier to divide and also hasten establishment. A well hydrated plant suffers less shock and takes a shorter time to take root.
- Carefully, slip the plant out of its pot and carefully seperate the offshoot from the mother plant. Ensure the offshoot has adequate roots and at least 2 leaves to hasten establishment.
- Select a 6 or 8 inch pot that has a drainage hole to prevent the soil from getting soggy as it can lead to rotting.
- Fill the pot with loose, well-drained, potting mix and make a hole in the center of the pot. Ensure that the hole is slightly wider than the root base of the offshoot.
- Place the offshoot in the previously made hole and lightly firm the soil around the base. Take care not to bury it too deep; maintain the offshoot at the same soil level it was in the previous pot.
- Wet the soil thoroughly and place the set up in a well-lit, warm place until the new plant is well established after which you can begin routine care.
Learn more on How to Propagate Anthurium Plants by 5 Easy Methods.
Anthurium clarinervium Problems & Solutions
Velvet Cardboard Anthurium problems are brown leaves, yellow leaves, drooping leaves, brown leaf tips, pests and diseases among others. Keep reading for more on these problems and how to fix them.
Brown leaves
Some of the causes of brown leaves on Anthurium clarinervium are inconsistent watering, soggy soil, temperature stress, dry air, salts buildup among others.
How to fix it
Inconsistent watering: Do not water on a schedule; water when the top 1-2 inches of soil feel dry and do not allow the soil to dry out completely.
Soggy soil: Use a pot with a drainage hole and free-draining soil.
Temperature stress: Keep the plant away from sources of drafts like heat sources, radiators, AC units, windy doors, drafty windows and others.
Dry air: Set the pot on a wet pebble tray, use a cool mist humidifier or group the plants together.
Salts buildup: Regularly, flush out excess salts by running a stream of water through the soil until the water drains through the drainage hole.
Yellow leaves
The main causes of yellow leaves on Anthurium clarinervium are too little light, inconsistent watering, soggy soil, drafts among others.
How to fix it
Too little light: Move the plant to a spot with bright indirect light or instal a grow light if the natural light is not sufficient.
Inconsistent watering: Water when the top 1-2 inches of soil dry out. Do not water on a schedule.
Soggy soil: Use a pot with a drainage hole and soil that is well-draining.
Drafts: Protect or keep the plant away from drafts from AC units, hot stoves, windy doors and windows, hot air vents among others.
Drooping leaves
Drooping leaves on Anthurium clarinervium are caused by low humidity, incorrect watering, direct sunlight, drafts or pests infestations.
How to fix it
Low humidity: To elevate humidity, set the pot on a wet pebble tray, use a humidifier or grow the plant in a well-lit bathroom, kitchen or laundry area.
Incorrect watering: Do not water on a schedule. Water when the top 1-2 inches of soil feel dry. Do not allow the soil to dry out completely.
Direct sunlight: Keep the plant away from direct sunlight or use a sheer curtain to filter the sunrays.
Drafts: Keep the plant away from drafts originating from AC units, windy doors, drafty windows, heat sources among others.
Pests infestations: Inspect the plant regularly for pests and take timely control measures.
Brown leaf tips
Brown leaf tips on Anthurium clarinervium are due to dry air, underwatering or soggy soil.
How to fix it
Dry air: To increase humidity, set the pot on a wet pebble tray, use a cool mist humidifier or grow the plant in a well-lit bathroom.
Underwatering: Water when the top 1-2 inches of soil feel dry and do not allow the soil to dry out completely.
Soggy soil: Use a pot with a drainage hole and free-draining soil.
Pests
Common pests on Anthurium clarinervium are spider mites, aphids and mealybugs which are prevent in dry conditions.
How to fix it
- Isolate the affected plant to prevent spread to other plants.
- Treat the plant with neem oil or insecticidal soap as per the manufacturer's instructions.
- Damp-wipe the leaves regularly with a soft cloth to discourage the pests.
- Maintain the plant well pruned to minimize the hiding and breeding places for these pests.
Diseases
Anthurium clarinervium is prone to root-rot disease which is more prevalent in soggy soil. It is characterized by yellowing and wilting of the leaves which is rapidly followed by browning and plant collapse.
How to fix it
- Carefully slip the plant out of its pot and inspect the roots.
- Trim brown-black, mushy roots and treat the healthy roots with a copper-based fungicidal solution as recommended by the manufacturer.
- Disinfect the pot with the fungicidal solution or use a fresh pot to repot the plant in fresh, well-draining soil.
- Use a pot with a drainage hole and free-draining soil to prevent the soil from soggy.
- Do not water the plant immediately and keep it dry for 5-7 days before you can resume watering.
- Lessen watering in fall and winter as growth is minimal at this time; keep the soil slightly moist.
Learn more on these 8 Common Anthurium Problems and How to Fix Them.
You liked it? Share on social media.
Related Content
Amazon Associates Disclosure
Homeplantsguide.com is a participant in the Amazon Services LLC Associates Program, an affiliate advertising program designed to provide a means for sites to earn advertising fees by advertising and linking to amazon.com.