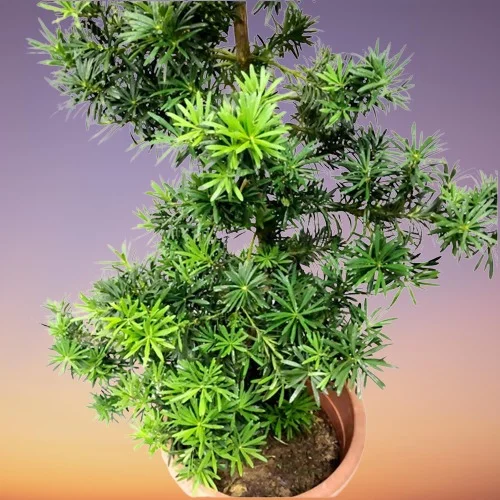
How to Propagate Podocarpus macrophyllus (Buddhist Pine) by 2 Easy Methods
Some links in this post may be affiliate links
Podocarpus macrophyllus (Buddhist Pine) is propagated from seeds or from semi-hard wood stem cuttings taken in the beginning of the growing period (spring and early summer). The plant bears cones in which are 2-4 scales, usually 1 or 2 are fertile. Each fertile scale bears a single apical seed which is 10-15 mm long.
The seeds are not easy to germinate and can take upto 18 months to germinate. The mature seeds are are sown into sandy potting soil. The scales must first be removed by scarification. Propagation by stem cuttings is much more successful than seed germination. This guide will teach you how to propagate Buddhist Pine successfully using stem cuttings and seeds. Let’s explore each method in detail.

(A) Podocarpus macrophyllus Propagation from Stem Cuttings
This is the fastest and most reliable way to propagate Buddhist Pine. This method ensures fast rooting and strong growth.
1. Select a Large Healthy Plant
Avoid any diseased or pest infested plant to prevent transmission of the same to the new plants. Ensure that the plant bears numerous shoots and is large enough that it will not be harmed from taking cuttings.
2. Identify the Right Shoots
Select the shoots from which you will take the cuttings. Go for those shoots that have new growth. If possible avoid shoots that are bearing flowers as they may take longer to root.
3. Take the Semi-hard Wood Stem Cuttings
Disinfect your cutting tool like pruning scissors, sharp knife or razor blade with rubbing alcohol or a mixture of 1 part bleach to 9 parts water.
With the clean sterilized cutting tool, take 3-4 inches of Buddhist Pine stem cuttings. Ensure each cutting has at least 2-3 leaf nodes as this is where new growth will come from.
4. Prepare the Cuttings
Remove leaves from the lower third to half of the Podocarpus macrophyllus cutting and leave one set of leaves.
Reduce the leaves by half to reduce water loss and preserve space. The leaves are important as they continue to photosynthesize (make) food for the cutting which is necessary for growth and root development.
To hasten rooting, wound the nodes a little by slightly cutting through with a sterile cutting tool.
Keep the cuttings cool and moist until you insert them into the rooting soil to maintain the turgidity of the plant cells.
5. Prepare the Planting Container or Pot
Fill a 4-6 inches deep container or pot with rooting mix. The best rooting mix for rooting be sterile, well aerated and free-draining but should retain enough moisture to avoid too frequent watering. Moisten the rooting mix slightly.
6. Plant the Cuttings
Put a small amount of a rooting hormone in a separate container to avoid contaminating the whole amount.
To enhance rooting, dip the base of the Buddhist Pine cuttings in the rooting hormone in the separate container.
With a pencil or anything similar make a hole wider than the diameter of the cutting in the moistened rooting mix.
Carefully to avoid rubbing off the rooting hormone, insert the Buddhist Pine cutting in the hole. Gently tap and firm the soil around the base of the cutting.
You can plant several Buddhist Pine cuttings in one pot but ensure that the leaves do not touch.
7. Cover the Set Up with Clear Polythene
Cover the set up with clear polythene to increase humidity and warmth but allow space for air circulation to prevent the cuttings from rotting.
Place the set up in a well-lit and warm place; avoid direct sunlight as it can cook the plants. To hasten rooting, place the set up on a heating mat if the temperatures are too cold.
8. Care for the Cuttings
Maintain the soil moist throughout until the Buddhist Pine cuttings are rooted. Remove any dead cuttings to maintain the set up clean and avoid disease infestation.
Allow substancial growth before transplanting the new Buddhist Pine plant; the cuttings should be ready for transplanting into individual containers in 4-6 weeks.
9. Transplant the New Plants
Thoroughly water the new plants to be transplanted. Fill pots about 4-6 inch diameter with well-draining, potting mix that is rich in organic matter.
Moisten the soil and make a hole in the center of the pot. Carefully lift the new plant with a ball of soil around the roots and place it in the previously made hole in the pot.
Ensure to maintain the same soil level for the new plant as it was in the rooting set up. Gently firm the soil around the base of the plant.
Water the soil thoroughly and place the new plant in a warm, brightly-lit place away from direct sunlight. You can now begin routine care.
(B) Podocarpus macrophyllus Propagation from Seeds
Seed propagation is less common but a rewarding method if you have access to fresh Podocarpus seeds. Growing Podocarpus from seeds takes longer but allows for genetic diversity.
1. Collect Fresh Seeds
Gather mature Podocarpus fruits (typically dark purple or blue).
Remove the outer pulp to extract the seeds.
2. Prepare the Seeds
Soak the seeds in warm water for 24 hours to soften the outer shell.
Dry them for a day before planting.
3. Plant the Seeds
Fill a seed tray or small pots with well-draining soil (peat moss + sand).
Plant the seeds 1/2 inch deep and lightly cover them with soil.
4. Provide the Right Conditions
Place the seed tray in bright indirect sunlight.
Keep the soil consistently moist but not soggy.
Maintain a temperature of 21-270C to encourage germination.
5. Wait for Germination
Seeds take 4-8 weeks to germinate.
Once seedlings develop 3-4 leaves, transplant them into larger pots and begin routine care.
Podocarpus macrophyllus Indoor Care
Buddhist Pine prospers in bright light with 4-6 hours of direct sunlight, warmth of 15-240C, humidity of 50-55% and moderately moist, rich, well-drained soil coupled with monthly feeding in the growing season. Learn how to grow and care for Podocarpus macrophyllus.
Frequently Asked Questions (FAQs)
1. What is the best time to propagate Podocarpus?
Spring and early summer are the best times to propagate Podocarpus, as warmer temperatures promote faster root growth.
2. Can I propagate Podocarpus in water?
Yes, but Podocarpus soil propagation is more successful. If propagating in water, change the water every 3-4 days to prevent bacterial growth.
3. How long does it take for Podocarpus cuttings to root?
Podocarpus cuttings typically root in 4-6 weeks under the right conditions.
4. How often should I water newly propagated Podocarpus?
Keep the soil moist but not soggy. Avoid overwatering as it can cause root-rot.
5. Do I need to use rooting hormone for propagation?
Rooting hormone is optional but it helps to speed up root formation, especially for semi-hardwood cuttings.
6. Can Podocarpus be grown from store-bought seeds?
Yes, but fresh seeds have a higher germination rate than the store-bought ones.
7. Why are my propagated cuttings dying?
This could be due to overwatering, low humidity or fungal infections. Ensure the right moisture balance and good airflow.
You liked it? Share on social media.
Related Content


Amazon Associates Disclosure
Homeplantsguide.com is a participant in the Amazon Services LLC Associates Program, an affiliate advertising program designed to provide a means for sites to earn advertising fees by advertising and linking to amazon.com.