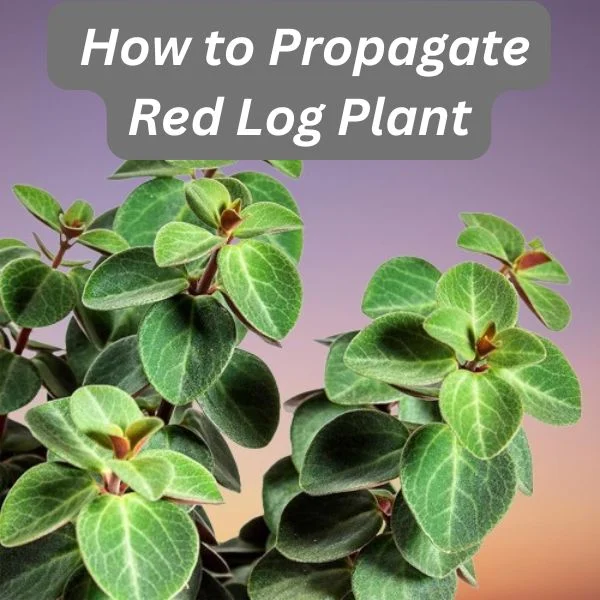
Peperomia verticillata (Red Log Plant) Propagation by 3 Easy Methods
Some links in this post may be affiliate links
Peperomia verticillata (Red Log Plant) is propagated from leaf and stems cuttings or by plant division. The cuttings can be rooted in water or in soil. They root easily and usually, there is no need for a rooting hormone.
The best time to propagate Red log Plant is during the growing season (spring to early summer) when the plant is actively growing. At this time, the plant has enough food reserves which are necessary for faster establishment.
Red Log Peperomia also called Whorled Peperomia or Belly Button is easy to propagate. Below we have outlined 3 methods by which you can increase your Peperomia Red Log stock.
1. Peperomia verticillata propagation from leaf in water
Peperomia Red Log leaf cuttings root easily and there is no need for a rooting hormone.
- Take leaf cuttings from a healthy plant and ensure each leaf cutting has a petiole as this is where new growth will come from.
- Allow some time for the formation of a protective callus tissue over the cuts of the leaf cuttings to prevent rotting.
- Place the leaf cuttings in a jar of clean plain water and change the water every 5-7 days.
- Place the set up in a warm, well-lit place until growth begins at the base of the cuttings leaf petiole. Allow enough time for substantial growth of the roots and new leaves.
- Transfer the rooted cuttings to individual pots in moist, cactus and succulents soil. For a fuller plant, transfer several cuttings in one pot.
- Place the pots in a warm, well-lit place away from direct sunlight to avoid scorching.
- Maintain the soil moist until the new plants are well established after which you can begin routine care.
2. Peperomia verticillata propagation from stem cuttings in soil
The stem cuttings root easily and usually there is no need for a rooting hormone.
- Take stem cuttings of about 4-5 inches length from a healthyplant and ensure each cutting has at least 2 sets of leaves. Strip off the lower leaves.
- Allow some time for the formation of a protective callus tissue over the cuts of the cuttings to prevent rotting.
- Fill a rooting container or pot with a free-draining soil like cactus and succulents soil. Moisten the soil lightly.
- With a pencil or anything similar make a hole in the center of the container and ensure that the hole is wider than the diameter of the cutting.
- Once callused, insert about 2-3 inches of the cutting in the previously made hole. Gently tap and firm the soil around the base of the cutting.
- Cover the set up with clear polythene to increase humidity and warmth but allow space for air circulation to prevent the cuttings from rotting.
- Place the set up in a well-lit and shaded place; avoid direct sunlight as it can cook the plants.
- Maintain the soil moist until new growth emerges and there is substantial growth.
- Remove any dead foliage to maintain the set up clean and avoid disease infestation.
- When you observe substancial growth, transfer the rooted stem cuttings to individual pots in cactus and succulents soil. For a fuller plant, transfer several cuttings in one pot.
- Thoroughly water the soil until the water comes out through the drainage holes.
- Place the pots in a warm, well-lit spot away from direct sunlight and begin normal routine care.
3. Peperomia verticillata propagation by division
- Water the plant thoroughly at least 1 day before to make it easier to divide and also hasten establishment.
- Remove out the plant from its pot and carefully divide it into sections by pulling apart the roots. Ensure each section has adequate roots to hasten establishment.
- Select a 6 or 8 inches pot and ensure that the pot has a drainage hole to prevent the soil from getting soggy as it can lead to rotting.
- Fill the pot with cactus and succulents soil and make a hole in the center of the pot. Ensure that the hole is slightly wider than the root base of the section.
- Place the section in the previously made hole and lightly firm the soil around the base while taking care not to bury it too deep; maintain the section at the same soil level it was in the previous pot.
- Water the soil thoroughly and place the set up in a well-lit, warm place until the new plant is well established after which you can begin routine care.
Peperomia verticillata Indoor Care
Red Log Peperomia grows best in bright indirect light (filtered light), warmth of 15-260C, humidity of 50-55% and moderately moist, fertile, succulents potting mix coupled with monthly feeding in spring and summer. Learn how to grow and care for Peperomia verticillata.
You liked it? Share on social media.
Related Content
Amazon Associates Disclosure
Homeplantsguide.com is a participant in the Amazon Services LLC Associates Program, an affiliate advertising program designed to provide a means for sites to earn advertising fees by advertising and linking to amazon.com.